Create a new Data Check-in Pipeline
The first step in the data check-in workflow is to establish a new data check-in pipeline. This begins by selecting the Create button found on the Data Check-in tab, which displays all data check-in pipelines created by the you or your organization.
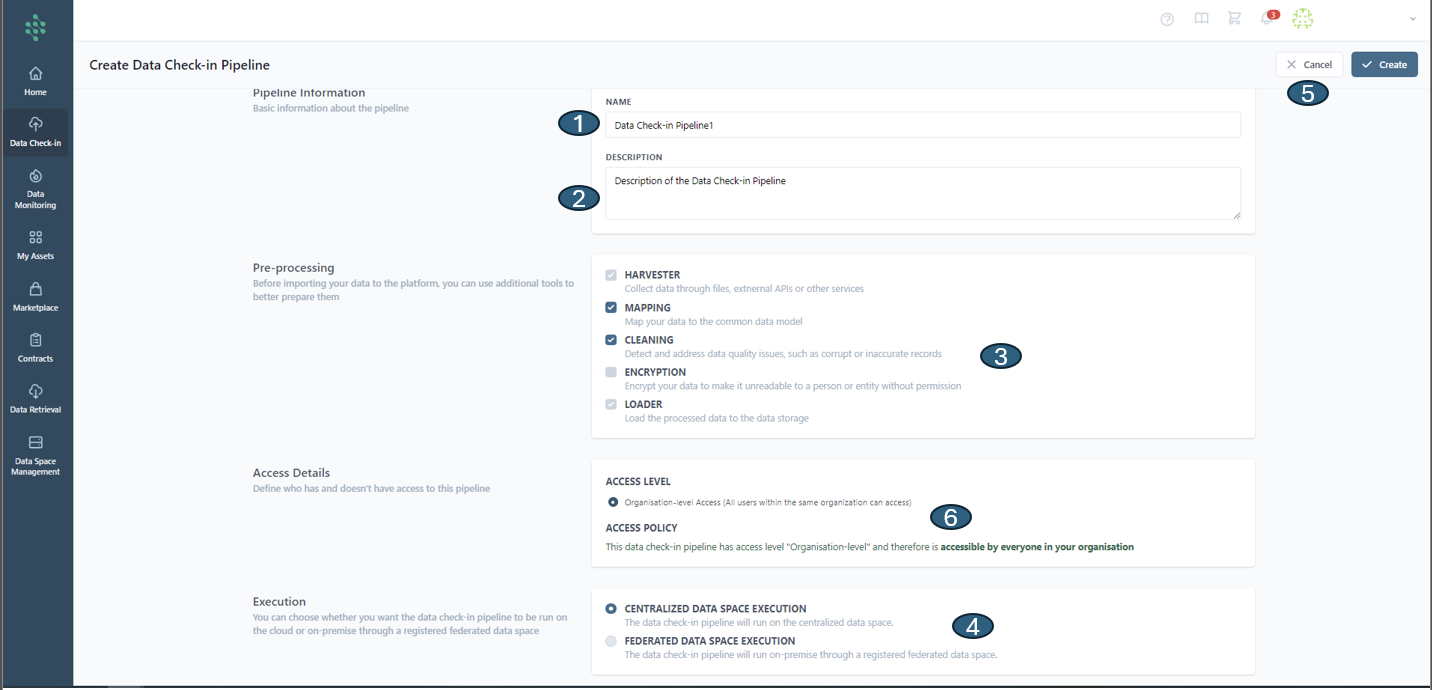
Initially, you are prompted to fill in the Pipeline Details, providing a name (1) and a descriptive overview (2) for the data check-in pipeline. Next, you must decide on the pre-processing steps to be applied, such as Mapping, Cleaning, and Encryption (3) to the incoming data. The final step involves choosing the execution environment (4), with options including Cloud Execution, to run the pipeline in the cloud, or On-premise Execution, via a registered federated data space. Completion of these steps allows for the finalization of the data check-in pipeline creation by clicking the Create button at the page's top right or cancelling (5) if necessary.
Upon completion, the newly created Data Check-in Pipeline (DCP) becomes accessible on the Data Check-in Pipelines page.
Hint
While Mapping is not obligatory, it's highly recommended to ensure the data aligns with the SYNERGIES Sectorial Data Models. Activating Mapping also unlocks the option to select the Cleaning step, crucial for addressing data quality issues (like corrupted or inaccurate records).
Hint
Access details are pre-set for organization-level access (6), allowing users within the same organization to access the pipeline. These settings are fixed and do not allow adjustments. This restriction applies solely to organization-level access and does not affect external access configurations.
Hint
The Encryption step becomes selectable solely when opting for on-premise execution, providing end-to-end data security during the harvesting process.